
PMI SUPPORT · STANDARD REMOTE V2
PMI Standard Remote V2 Support
Pair your remote, choose Trigger or ON/OFF mode, and find help with controls, batteries and connection issues.
PMI Battery Guide ↗
LEARN STANDARD REMOTE V2
Tutorial Videos
Watch the official Standard Remote V2 tutorial for pairing, control modes and the rear setup buttons.
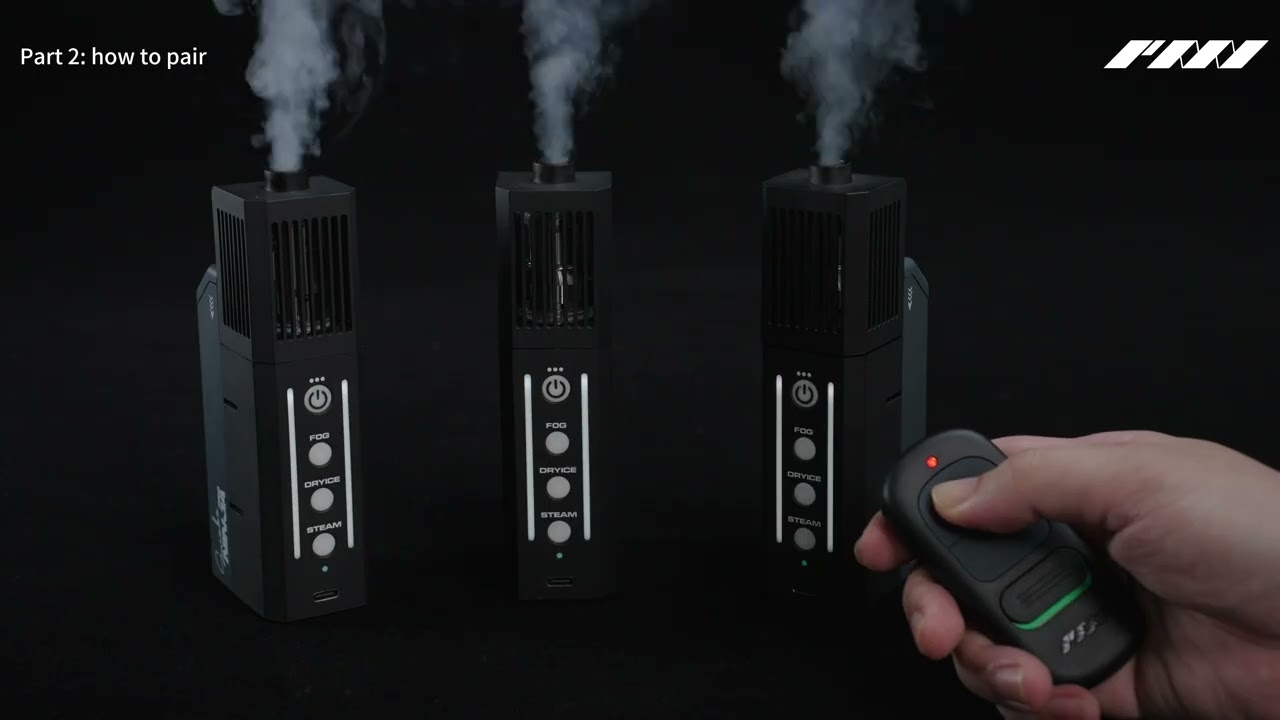
PMI Standard Remote V2 Tutorial
Video correction at 2:42: After pairing, Standard Remote V2 uses Trigger mode. Hold ON for fog and release it to stop. Select ON/OFF mode for separate start and stop commands.
▶ Standard Remote V2 pairing and controlsFAQ & Troubleshooting
Chapter 1 of 4 · Pairing & Connection
How do I pair my Standard Remote V2?
Turn the remote ON and open its rear cover. 1. Switch the machine OFF, then ON. Finish pairing within 30 seconds. 2. Hold A / PAIR for 5 seconds, then release. The machine’s REMOTE light turns solid red. 3. Press ON once, then OFF three separate times. REMOTE blinks after each press. Test: hold ON to start fog, then release to stop.
Turn the remote ON and open its rear cover.
1. Switch the machine OFF, then ON.
2. Within 30 seconds, begin holding A / PAIR. Hold for 5 seconds, then release. Watch the machine’s REMOTE indicator light up.
3. Press ON once, then OFF three separate times.
After pairing, the control mode is set to Trigger mode by default. Hold ON to produce fog; release ON to stop. To use separate start and stop commands, follow How do I switch to ON/OFF mode? in the Control Modes tab.

A / PAIR — first button from the left.
Use A to begin pairing, then press the front ON button once and OFF three separate times.
How do I remove all paired remotes?
This removes all remote pairings from the machine, including other remotes. 1. Turn the remote ON and open its rear cover. 2. Switch the machine OFF, then ON. 3. Within 30 seconds, hold B / UNPAIR for 5 seconds, then release. The machine’s REMOTE light flashes a few times. Pair each remote again before use. No ON / OFF button sequence is needed to clear pairings.
This clears all remote pairings stored on the machine, including other remotes.
1. Turn the remote ON and open its rear cover.
2. Switch the machine OFF, then ON.
3. Within 30 seconds, press and hold B / UNPAIR until the machine’s REMOTE indicator flashes, then release.
Pair each remote again before use. No ON / OFF button sequence is needed to clear pairings. The Haze Nozzle’s separate Bluetooth pairing is not affected.
B / UNPAIR — second button from the left.
This clears every remote pairing stored on the machine. Hold B until the machine’s REMOTE indicator flashes.
Which PMI machines can I use with this remote?
Standard Remote V2 is compatible with SmokeNINJA PRO V2, SmokeNINJA PRO, SmokeNINJA and SmokeGENIE. Pair the remote with each machine before use.
Standard Remote V2 is compatible with SmokeNINJA PRO V2, SmokeNINJA PRO, SmokeNINJA and SmokeGENIE. Pair the remote with each machine before use.
Can I control multiple machines with one remote?
Yes. One Standard Remote V2 can be paired with multiple PMI fog machines. Repeat the pairing procedure for each machine you want to control.
Yes. One Standard Remote V2 can control up to 5 compatible PMI fog machines simultaneously. Pair one machine at a time, repeating the pairing procedure for each machine. Test all paired machines before use.
Can I use more than one remote with the same machine?
One Standard Remote V2 can control up to five machines. Each machine can be paired with up to four remotes. Pair each remote separately. B / UNPAIR clears every remote pairing on that machine. Pair the remotes again before using them.
One Standard Remote V2 can control up to five machines. Each machine can be paired with up to four remotes. Pair each remote separately. B / UNPAIR clears every remote pairing on that machine. Pair the remotes again before using them.
Chapter 2 of 4 · Control Modes
What is the difference between Trigger and ON/OFF mode?
1. Trigger mode: hold ON to produce fog. Release ON to stop. 2. ON/OFF mode: press ON to start fog. Press OFF to stop.
After pairing, the control mode is set to Trigger mode by default.
1. Trigger mode: hold ON to produce fog. Release ON to stop.
2. ON/OFF mode: press ON to start fog. Press OFF to stop.
The machine’s normal output and protection limits still apply.

Front ON and OFF buttons.
Trigger mode: hold ON to run; release to stop.
ON/OFF mode: press ON to start; press OFF to stop.
How do I switch to Trigger mode?
Turn the remote ON and open its rear cover. 1. Switch the machine OFF, then ON. 2. Within 30 seconds, hold C / TRIGGER MODE for 5 seconds, then release. 3. Check that the machine’s REMOTE light flashes a few times. Hold ON for fog; release ON to stop. No pairing button sequence is needed.
After pairing, the control mode is set to Trigger mode by default. If you have changed to ON/OFF mode, use these steps to switch back. Turn the remote ON and open its rear cover.
1. Switch the machine OFF, then ON.
2. Within 30 seconds, begin holding C / TRIGGER MODE. Hold for 5 seconds, then release.
3. Check that the machine’s REMOTE light flashes a few times.
Hold ON for fog; release ON to stop. Changing mode does not require repeating the pairing sequence.
C / TRIGGER — third button from the left.
C selects press-and-hold operation. Once selected, hold the front ON button to run and release it to stop.
How do I switch to ON/OFF mode?
Turn the remote ON and open its rear cover. 1. Switch the machine OFF, then ON. 2. Within 30 seconds, hold D / ON/OFF MODE for 5 seconds, then release. 3. Check that the machine’s REMOTE light flashes a few times. Press ON to start fog. Press OFF to stop. No pairing button sequence is needed.
After pairing, the control mode is set to Trigger mode by default. Complete pairing, including the ON-once / OFF-three-times sequence, before selecting ON/OFF mode. Turn the remote ON and open its rear cover.
1. Switch the machine OFF, then ON.
2. Within 30 seconds, begin holding D / ON/OFF MODE. Hold for 5 seconds, then release.
3. Check that the machine’s REMOTE light flashes a few times.
Press ON to start fog; press OFF to stop. The machine’s normal output and protection limits still apply.
D / ON–OFF — fourth button from the left.
D selects separate start and stop commands. Once selected, press the front ON button to start and OFF to stop.
How do I check that pairing worked?
After pairing, test the default Trigger mode: 1. Hold ON. Fog should start. 2. Release ON. Fog should stop. If both happen, pairing was successful.
After pairing, the control mode is set to Trigger mode by default. Check the start and stop controls:
1. Hold ON. Fog should start.
2. Release ON. Fog should stop.
If you then select ON/OFF mode, test it by pressing ON to start fog and OFF to stop. Check both start and stop before use.
Chapter 3 of 4 · Battery & Controls
Which battery does the remote use?
Standard Remote V2 uses one 23A 12 V battery. Check the battery type and polarity markings when fitting a replacement.
Use one A23 alkaline 12 V battery, also marked 23A on the remote. A battery is included with the standalone Standard Remote V2 (PMI_AC_REMO2). Follow the compartment’s +/− markings when fitting a replacement.

Battery compartment beneath the rear cover.
Use a 12 V A23 alkaline battery. Match the battery’s + and − ends to the markings inside the compartment.
What do the front controls do?
1. Power switch — turns the remote ON or OFF. 2. ON button — hold for fog in Trigger mode, or press to start fog in ON/OFF mode. 3. OFF button — stops fog in ON/OFF mode. In Trigger mode, release ON to stop fog.
1. Power switch: turns the remote ON or OFF. Green visible means ON.
2. ON button: hold for fog in Trigger mode, or press to start fog in ON/OFF mode.
3. OFF button: stops fog in ON/OFF mode.
In Trigger mode, release ON to stop fog.
Where are the A, B, C and D controls?
Open the rear cover. The four controls run from left to right: 1. A / PAIR — enter pairing mode. 2. B / UNPAIR — clear all remote pairings from the machine. 3. C / TRIGGER MODE — select Trigger mode: hold ON for fog; release to stop. 4. D / ON/OFF MODE — select ON/OFF mode: press ON to start fog; press OFF to stop.
Open the rear cover. The four setup controls run left to right in the order below. A–D are guide labels; the remote itself uses icons:
1. A / PAIR: enter pairing mode.
2. B / UNPAIR: clear all remote pairings from the machine.
3. C / TRIGGER MODE: select Trigger mode. Hold ON for fog; release to stop.
4. D / ON/OFF MODE: select ON/OFF mode. Press ON to start fog; press OFF to stop.
Which light should I watch during setup?
Watch the machine’s REMOTE light. On the SmokeNINJA models shown in the manual, it is on the bottom. 1. Solid red after A / PAIR: pairing mode is ready. 2. One blink after each ON / OFF press: the machine received the signal. 3. A few flashes after B, C or D: the machine received the erase or mode command.
Watch the machine’s REMOTE indicator. On the SmokeNINJA PRO shown in the tutorial, it is on the bottom.
1. During pairing, the indicator lights up when the machine is ready for the ON / OFF button sequence.
2. The indicator flashes after an erase or mode-change command.
Test both start and stop after setup.
Chapter 4 of 4 · Troubleshooting
Why won’t my remote control the machine?
1. Check that the machine and remote are ON. 2. Move closer to the machine. Check the remote’s 23A 12 V battery; replace it if weak. 3. Switch the machine OFF, then ON. Within 30 seconds, hold A / PAIR for 5 seconds, release, then press ON once and OFF three times. 4. Hold ON to start fog; release to stop. Still no response? Contact cs@pmigear.com.
1. Check that the machine and remote are ON.
2. Move closer to the machine. Check the remote’s A23 alkaline 12 V battery; replace it if weak.
3. Open the remote’s rear cover. Switch the machine OFF, then ON. Within 30 seconds, begin holding A / PAIR. Hold for 5 seconds, release, then press ON once and OFF three separate times.
4. After re-pairing, the control mode is set to Trigger mode by default. Hold ON to produce fog; release ON to stop.
If the machine still does not respond, contact cs@pmigear.com with your machine model and the indicator behavior you see.
Check the sliding power switch below the front buttons.
The green marking is visible when the remote is ON. Confirm power before testing the connection again.
Why doesn’t the machine respond during pairing?
1. Turn the remote ON and open its rear cover. 2. Switch the machine OFF, then ON. 3. Within 30 seconds, hold A / PAIR for 5 seconds, then release. Watch the machine’s REMOTE light. If it does not turn solid red, move closer and check the remote’s battery, then try again.
1. Turn the remote ON and open its rear cover.
2. Switch the machine OFF, then ON.
3. Within 30 seconds, begin holding A / PAIR. Hold for 5 seconds, then release. Watch the machine’s REMOTE light.
If the indicator does not respond, move closer and check the remote’s battery, then try again. If it still does not respond, contact cs@pmigear.com with your machine model.
Why does fog stop when I release ON?
This is normal in Trigger mode. Hold ON to produce fog; release ON to stop. To start and stop fog with separate button presses, follow “How do I switch to ON/OFF mode?” in the Control Modes tab.
After pairing, the control mode is set to Trigger mode by default. In Trigger mode, hold ON to produce fog; release ON to stop.
To use separate start and stop commands, follow How do I switch to ON/OFF mode? in the Control Modes tab.
Why does fog continue after I release ON?
Press OFF to stop the fog. In ON/OFF mode, releasing ON does not stop output. To produce fog only while holding ON, follow “How do I switch to Trigger mode?” in the Control Modes tab.
Press OFF to stop the fog. In ON/OFF mode, releasing ON does not stop output.
To produce fog only while holding ON, follow How do I switch to Trigger mode? in the Control Modes tab.
Why did all remotes stop working after UNPAIR?
B / UNPAIR removes all remote pairings from the machine, including other remotes. To use the remotes again, repeat the pairing procedure for each one.
B / UNPAIR removes all remote pairings from the machine, including other remotes.
To use the remotes again, repeat the pairing procedure for each one.
Specifications
POWER & CONTROLS
Battery
1 × A23 alkaline, 12 V cell (marked 23A on the remote). Included with the standalone Standard Remote V2, SKU PMI_AC_REMO2.
Front controls
ON button · OFF button · Power switch
Rear controls
A / PAIR · B / UNPAIR · C / TRIGGER MODE · D / ON/OFF MODE. A–D are guide labels; the remote uses icons.
PAIRING & OPERATION
Control modes
Trigger mode is selected by default after pairing: hold ON for fog; release ON to stop. Select ON/OFF mode for separate commands: press ON to start; press OFF to stop. Machine output and protection limits still apply.
Setup window
Begin the rear-button setup command within 30 seconds after switching the machine on.
Rear-button hold time
PAIR, TRIGGER MODE and ON/OFF MODE: hold for 5 seconds, then release. UNPAIR: hold until the machine’s REMOTE indicator flashes, then release.
Machine feedback
Watch the machine’s REMOTE indicator during pairing and mode changes. On the SmokeNINJA PRO shown in the tutorial, it is on the bottom.
COMPATIBILITY
Compatible PMI machines
SmokeNINJA PRO V2 · SmokeNINJA PRO · SmokeNINJA · SmokeGENIE
Multiple-machine control
Control up to 5 compatible PMI fog machines simultaneously. Pair one machine at a time.
Multiple remotes
Pair multiple remotes with one machine. UNPAIR clears every remote pairing stored on that machine.
Wireless
433 MHz RF
Range
Up to 10 m, line of sight
Dimensions & weight
Remote: 8.5 × 4 × 1.5 cm, 38 g. Standalone packaged: 10 × 2 × 4.5 cm.
Need More Help?
Need help with your Standard Remote V2? Email cs@pmigear.com with your machine model, a photo of the remote, and what the machine’s REMOTE indicator does during setup. These details help us check your pairing and controls.
Contact CS@pmigear.com